I am so excited about this project!
I've had this idea for awhile, but finally got my supplies purchased and the time to get it done!
This rocking horse is Levi's "big" present from Santa.
If you don't remember....I'm trying to do a "Semi-Homemade Christmas".
I'm thrilled that Levi's little horse was lovingly made by his Mama.
So, here's what you need:
Wooden Rocking Horse (available at both Michael's and JoAnn...but Michael's is cheaper!)
Paint
Coordinating scrapbook paper (at least 4 sheets)
Modge Podge
2 brushes
Coordinating Ribbons
Scissors
Staple gun
Here's the play-by-play
I purchased this sweet, unfinished wooden rocking horse at Michael's.
It is normally $30, but I had a 50% off coupon....bringing it to $15.
Always have a coupon.
Next I found this paint sample we had. It's a perfect gray-blue color.
It was in the mis-tint section at Lowe's for $1.
It is Valspar's Winter Flannel.
I did one coat on it and let it dry.
I was going to do two coats, but I kind of liked how the grain showed through.
Then I got my scrapbook paper ready.
Can I just say, it is hard to find cute boy scrapbook paper?
I went with the transportation paper with coordinating stripes and houndstooth.
His playroom is transportation themed, so I thought it would go.
I purchased the scrapbook paper at JoAnn for $2.
Once the horse is dry, get your Mod Podge ready.
Thankfully, Mr. Free had some in his art stash.
The blessings of being married to an art teacher...
Figure out where you'd like the scrapbook paper on your horse.
Then lay the paper down and trace along the outline of the area.
Then, apply a layer of Mod Podge in that spot.
Put the cut paper down on it and apply a thin coat of Mod Podge on top.
Let it dry.
Here's the areas I went with...
I then cut out the letters for his name.
Love things that are personalized.
I just free-handed it, so it isn't perfect.
You could find a font you like, print it off then trace around it for a more "finished" look.
With the letters, do just like you did before.
A thin layer of Mod Podge below the letters, then a thin layer over top.
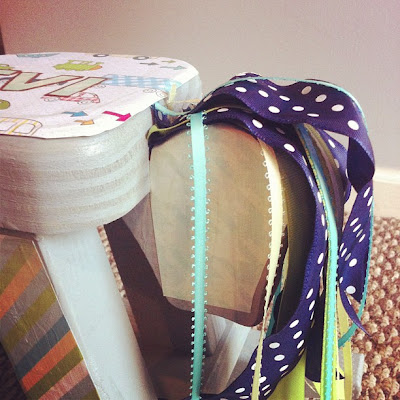
Now onto the mane...
I decided to do a ribbon mane instead of yarn.
I picked these 4 colors.
I liked the varying widths as well.
Cost $8 at JoAnn.
I cut them varying lengths and with different decorative cuts on the ends.
Then, I just staple-gunned them onto the horse.
Once the Mod Podge was dry, I took a brown paint pen and outlined Levi's name.
The light blue houndstooth faded into the other paper too much for me.
I let everything dry.
Then...for one last decoration, Mr. Horsey got a bandana.
All finished!!!
Some details
The grand total was: $25
I absolutely love it and cannot wait to put it under the tree!


No comments:
Post a Comment
I love comments! Thanks for leaving me one! I read each and everyone one! xoxo Jenny Free