Tuesday, September 25, 2012

7 Month Mamahood Reflection

*warning: cuteness overload* 
 Age: 7.5 months

Accomplishments:
 Feeding self
Sitting up completely unassisted (with great posture I might add)
Crawling. Legit crawling.
Pulling up to standing
Saying Dada, the occasional Mama
 This kid is all over the place.
He may look a smidge like me, but his personality is ALL daddy.
Levi is SO stinkin happy. Happy happy happy.
And he is wild.
He is active.
He is his dad.


 He likes to move it move it. 
(Anyone else sing it like in Madagascar?)

 Memories:
Now that it is FALL...we went to the pumpkin patch!
Our amazing babysitter got us free tickets to the local patch so we all went together.
It was SO much fun!
I've looked forward to fall with a kiddo for quite awhile.
Fall is my favorite, and we were blessed with a cool crisp Fall morning when we went.

We took a hayride to the patch and picked out a little tiny Levi pumpkin.
 We munched on cider donuts, took lots of pictures, pet animals and watched a pig race!

Eating
Again, this kid is fed every which way.
We are still nursing, but mainly morning and bedtime.
After returning to work my supply really diminished.
But, considering all my issues...I'm thankful to have made it this far!
We started Levi on purees for solids, but have transitioned to Baby Led Weaning.
I am LOVING it!
It is SO much easier than making purees and sitting down and spoon feeding him.
(We still do this on occasion)
He is eating just what we are, so he can eat meals when we do.
He is eating a variety of foods.
And he is getting SO good at feeding himself!
His grabbing, pinching and chewing skills are really taking off!

Babywearing
 I did a post recently on the basics of babywearing and how I'm loving it.
No need to re-type that whole post...feel free to check it out HERE
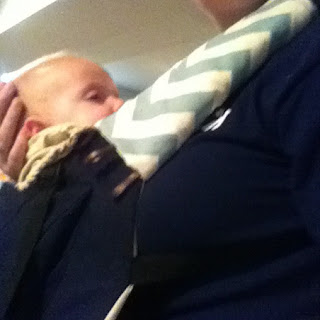
 I wore him at the Pumpkin Patch, which was perfect.
It was chilly so we both kept snuggly.
I've been wearing him around the house and at the store.
Definitely loving it.

Teething
We are in the midst of teething.
No teeth yet.
Just rock hard gums.

Mama's thoughts

I always thought Mom's who cried at everything were so strange.
Now I understand.
I can't believe my baby is nearly 8 months!
He is getting SO big!!!
Every time he hits a new milestone, I am SO proud of him, but a piece of me is sad that he is growing up.
I just want to snuggle my little baby boy forever.
I know each stage of his life gets better and better, but I definitely can relate to those sentimental moms.
I'm in that club.

I'm incredibly thankful to be a "mostly home" mom and only work part-time. I want to savor each and every moment with this sweet little boy.
He is such an incredible blessing.
 These past 7.5 months have been so incredibly joyful.
Thank you Lord for assigning this little man to me!

Thursday, September 20, 2012

DIY Ruffled Tote


This project is SOOO adorable.
And easy....once you get the hang of it.

Here's what you'll need:
A blank canvas bag (got mine for $1.99 at Hobby Lobby)
5 5 inch strips of fabric (the length should be about twice as wide as the bag)
(can be all same, or variety of coordinating fabrics)
3-4 extra scraps of long fabric (for roses)
8 X 8" piece of coordinating fabric cut out 
Sewing machine
Glue gun

First, take your 5, 5inch strips of fabric and top stitch around all 4 sides.

Next, you will make the ruffles. Using durable, thick thread, and using the loosest stitch on your machine, make a straight stitch down the length of each strip about a half inch from the top. Do not reinforce edges.
When you get to the end, cut the thread to where you have a lot of thread still hanging off the end of the strip of fabric.

To create the ruffle you will pull just one of the pieces of thread on each side and pull. You will need to work the ruffle down toward the center.

If you'd like to add a pocket, this is the time.
Top stitch the square piece of fabric first, then using a zigzag stitch, sew the pocket onto the back of the tote.

 Once you've done this for all 5 pieces, lay them out on your tote how you'd like them arranged. 
I tried sewing these on at first, and it was a disaster.
I then hot glued them, and it worked great.
Starting with the bottom ruffle, slowly make a line of hot glue and press down your ruffle. 
 For the roses, check out this tutorial. She did a much better job explaining than I ever could.
I added four roses on mine, but add as many as you'd like!

That's it!

Since I'm sewing so much lately, it's a great and cute way to use up that pile of scrap fabric!
 I'm taking my tote to work today. 
I'm excited : )


Monday, September 17, 2012

Etsy Shop Organization: The Business Side

 I've previously shown you the physical make up of my little Etsy "shop". 
It's just small corner of our family room.
To check out how I organized all the "things" that come along with a shop, look here!

Now, onto the "business" side of things.
I use this term loosely, as it is more of a hobby for me.
But, have to keep it organized!

So, I started with an adorable green chevron binder on clearance at Target for $1.20
 Cute huh?

Then filled it with practical items I use with each transaction.

Let's peek inside.
 On the left are stamps, business cards and a pen.

Next comes the paperwork. If have forms to fill out to keep things running smoothly.
It includes a place to list current orders
 A place to keep track of current inventory and items I am needing
 And a form to track my expenses....to see if I'm really making a profit!
 You can download these forms for you! For free!

Next, in page protectors I have thank you cards w/envelopes.
I include a little handwritten thank you with each purchase. : )
 Next are some plain white mailers for small orders.
 Then my stash of bags for local orders
 Lastly a pad of legal paper to jot notes and ideas
I'm a newbie at this whole Etsy thing, but so far, so good!
Keeping organized really helps me manage my little store, with work, home, husband and baby!
Any other Etsy shop owners that have any tips on how they keep organized?

Sunday, September 16, 2012

Home Organization: Hall Closet


 Week Two's goal was to organize the hall closet.
This hall closet is always changing based on our current needs.
Since our house is small, we don't have a lot of storage so have to be smart with what we have.
She may not be the prettiest, but I gave everything a place and reused baskets and totes I already owned.
Mission cost: $0
 Our hall closet contains our necessities:
Coats/jackets
Work bags
Vacuum/ Steam mop
Winter gear
Hats
Purses
Reusable totes
Purses

This is also where our mismatchy hangers go before they die. So no, this isn't the prettiest closet space you'll see.
But its functional.

Here is how the top of the closet is organized
 These are items we use on a nearly daily basis.
By corralling them into baskets, it gives a much neater appearance as well.
And yes, Mr. Free has a ton of hats.
Almost as many hats as shoes.

As "temporary" closet doors, we've hung bed sheets from drapery clips to cover our closets.
I use the word "temporary" loosely because they've been that way 5 years and counting..

This works for us, as it can cover the closet and not take up any precious hallway room for a door to swing out to access our stuff.


Mission accomplished.

Wednesday, September 12, 2012

Babywearing 101


I am now a firm believer in baby wearing. For me and my baby.
In no way is this the right way to parent. 
It's working for us at this time.

Babywearing tends to be linked to Attachment Parenting.
We are not an "attachment parenting" household.
In fact, I hate even labeling parenting styles.
Every family, child, parent is so different.

Anyways....
When Levi was a wee little baby he loved to be held.
Luckily we were given a Moby wrap and it was wonderful.

But the Moby is not convenient when out and about.
It's like 30 feet of fabric, so struggling to wrap that in a parking lot with a baby is challenging.

We then transitioned to a Baby Bjorn (was a hand me down we were given) and the first time I wore it, I thought it was great!
Then...the next morning I woke up with a severe back ache.
I have mild scoliosis, so these two things didn't jive.
As I learned, the Baby Bjorn puts a lot of the weight of the baby between your shoulder blades.
No bueno.

We used it off and on, but I mostly let Mr. Free use it.
I didn't want another killer backache.

Fast forward to now.
Levi is teething and what helps him the most is to cuddle him.
It is sweet, but definitely inconvenient if I'd like to keep a clean house or go to the grocery store.
I knew I needed a new carrier.

I researched and researched and found some good options.
Many recommend the Boba, Beco and Ergo.

Most people recommended the Ergo.
Plus, it was the only one of the three they had at Buy Buy Baby.
And I had a coupon.
And things to return.

The Ergo won.

Here I am, sporting my new Ergo in the parking lot.
 Oh my gosh, I love it.
He feel so light.
My back doesn't even hurt!
I love how it displaces his weight across my waist, shoulders and back.

Well, I saw in the store and online that they had some accessories. The one I was really interested in was the teething pads. Since we are in the midst of that season right now with Mr. Levi.
However, they were $20 and the Ergo itself was already pricey.
I searched Etsy and found several cute options that were cheaper than $20.
However, before pulling the trigger, Mr. Free said I should just make them.
I hadn't tried making something like that before, but I did it!
And I love it turned out!

I made aqua chevron teething sleeves.
They have a yellow flannel reverse and are lined with quilt batting to absorb the drool.
I also added some ribbon loops to the bottom to hang toys.
I then realized that at the bottom of the Ergo was a piece of fabric that wasn't attached on all 4 sides.
I decided to make an aqua chevron pouch that velcro-ed around the loop to add more storage.

One other thing I love about the Ergo is that it has a zip pocket that is pretty large for an extra diaper, your cell phone, keys, etc.

No more trying to wear your baby while juggling a diaper bag! Yay!

So here is my customized Ergo.

I absolutely love it and so does Levi. When I put him in it, his fussiness stops and he falls right asleep.
I know teething has made him miserable, so anything I can do to help comfort him, I will!

- Confidence and security for baby/toddler
- Necessary human contact for child
- Hands free snuggles for parents
- Bonus exercise for mom (carrying around 10+ pounds for hours at a time!)
- Helps continue special bond from pregnancy

Babywearing is not just for Mama either. Dads and caregivers can also partake in this closeness and convenience!

But again, this is what works for us, at this time.

Anybody else a BabyWearer?
Any recommendations on carriers/wraps etc.?
Any other tips?

P.S. If anyone is interested in their own custom Ergo accessories (Teething sleeves, waist pouch, etc.) shoot me an email and we can arrange it!

Thursday, September 6, 2012

Scripture Memory

I haven't purposefully memorized scripture since I was a kid.
Sad, I know.
But lately my heart has really been burdened on how vital scripture memory is.
By having God's Word stored in your heart and mind, it is always with you.
When trouble arises, God can bring those precious passages of scripture to mind.
He can also use those scriptures to share with someone else who may need them.

So, in my new venture to memorize God's Word, I played around on Google Docs and made a few little pieces of word art to help keep some of my favorite verses fresh.
I plan to print them off, maybe frame them too.
Click the link below each picture if you'd like to download it yourself!

So do you make scripture memory a priority?
Have you let it slide like I have?
Any Scripture Memorizers have any tips to share?

Wednesday, September 5, 2012

My Home Organization Challenge

I've mentioned how I am taking the Home Organization 101 Challenge from over at A Bowl Full of Lemons.

It's a great inspiration and motivator and I encourage you all to take it along with me!
The only thing is, is that I have a small home (as you know) and not all her weekly challenge spaces were applicable.
So, I created my own timeline.
I based it off of hers, but tweaked it to fit my needs.

Tada.

My challenge is three weeks shorter, because I have much less square footage and rooms than the average America.
Less to clean! : )

So, feel free to use my timeline, A Bowl Full of Lemons, or make your own!
Week one is already done, so only nine weeks left until I have a totally organized home!
Who is taking the challenge with me?

Monday, September 3, 2012

small kitchen organization

As previously mentioned, I am on a mission to organize my entire home in 14 weeks. I had done a lot to organize it in the past few months, but now's the time to fine tune and be ready for the holidays!
The first week of the challenge is the kitchen!

Our kitchen is small.
Teeny tiny.
Most people's closets are bigger than our kitchen.
So we have to be incredibly particular on what belongs in it to keep it functional.

Here's the breakdown of what we keep where
 
 We decided to keep only food items that are used on a daily basis in the kitchen. The excess and seldom used items go down to our basement pantry.
We don't have a pantry in the kitchen, so our food items must go in the cabinets.
Before, we had items that were hardly used or too big.

I purged anything old, used some baskets I already had to corral different groups of items and moved hardly-used things down to the basement pantry. MUCH better!
In moving out all the rarely used items, I was able to clear off the top of the fridge (where cereal and snack foods liked to hang out) and put them in the cabinets. Now the top of the fridge looks much better!
The big basket contains our lunch bags, and the little basket has excess tea towels.

Next came my bakeware cabinet. This is a deep cabinet, but the only cabinet available for bakeware, bowls and appliances.
I took everything out and utilized the organizational pieces I already owned.
I grouped like items and made sure they were easily accessible.
Next, the plastic plate drawer. 
Our upper cabinets contain our "good" plates and glasses, but there wasn't enough room for our plastic items.
Unfortunately, the drawer also began to house junk as well.
I just got back to the basics. Only plates allowed.
Our bottom drawer contained all of Levi's items. Sippy cups, food storage, dishwasher basket, bibs, etc.
Yikes.
I lumped everything according to category and made them all easy to reach, with the more used items toward the front. Tada!

So, that's what I've been up to this long weekend. 
It's been so nice to have an organized kitchen to cook in!
And small kitchens can be both pretty and functional!
It just takes a lot of effort.